During a service at Jaz early in 2010 – Steve expressed his concern about the state of the underside of my car. Use of the car in all weathers over a number of years had started to take its toll and the floor pans and sills were becoming distinctly frilly round the edges.
Steve pointed me in the direction of Bruce Cooper at Sportwagen.
Over To You Bruce!
I was no stranger to Sportwagen as Steve had previously directed me to Bruce after the torsion tube on my 911 had split en route to a Christmas break up North.
I drove across to the Sportwagen workshop at Great Wakering to let Bruce have a good look over the car to assess fully the extent of work required to repair and preserve it. It was fascinating to see him spot flaws and issues that I was blissfully unaware of and it was clear that the work extended well beyond the underside of the car.
Leaving the car with Bruce to complete his assessment – I headed back to London by train. Bruce called a day or so later to talk me through what needed to be done and kindly offered to make an instant start on the car.
Horror Story
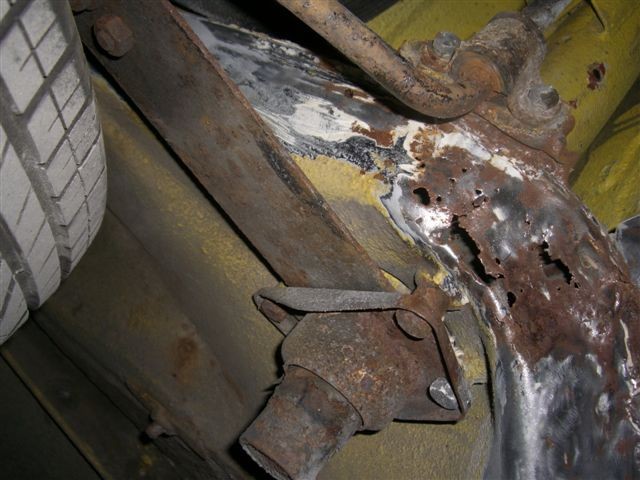
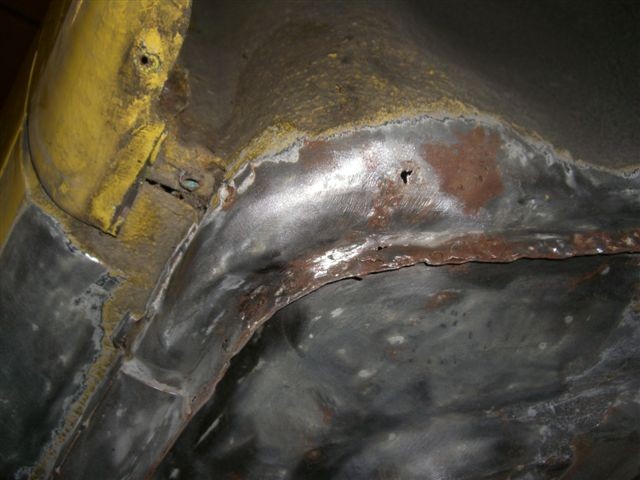
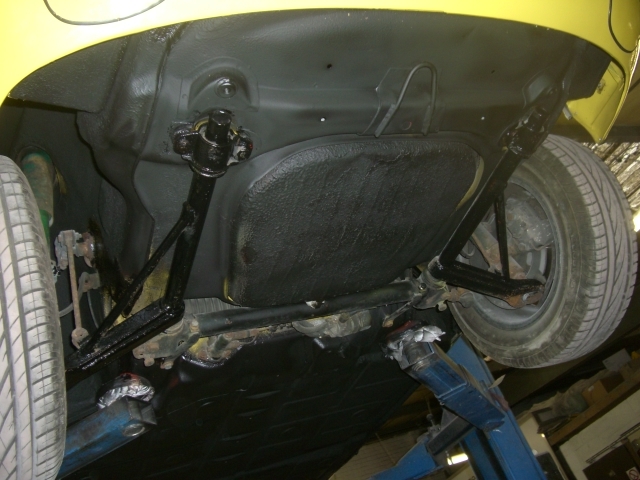
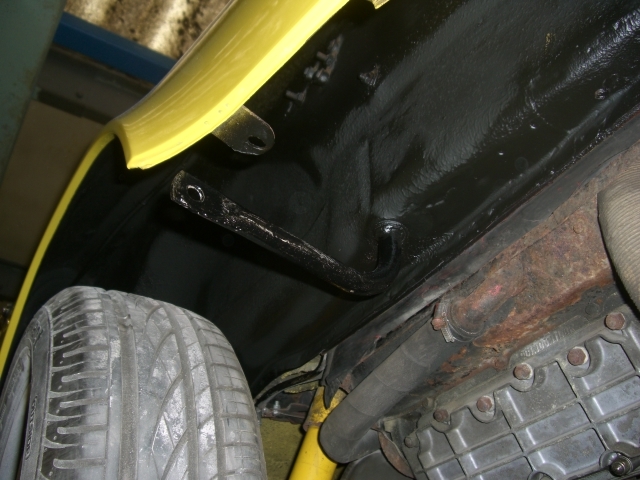
Initial work focussed on stripping the underside of the car back to bare metal. This revealed the areas of rust that needed to be cut out and replaced with new metal. In parallel with this – work also started on the doors, bonnet, front and rear bumpers, sunroof and other areas of the bodywork.
Regular emails from Bruce contained a series of horrific pictures of what was being revealed underneath the car. Thank goodness Steve nudged me to get this sorted when he did.
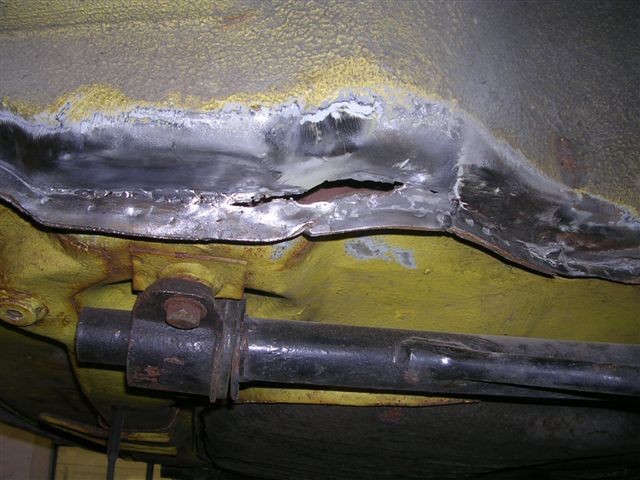
Bearing in mind that the car had allegedly gone through a “full restoration” it’s frightening to see how quickly old metal can deteriorate and it shows why proper restoration of these cars is such a time consuming and expensive job – when done properly.
To illustrate this point – on one of my visits Bruce showed me a very early 356 he was working on. Having separated the alloy body from the chassis – the metalwork of what was left of the chassis was revealed and upon close inspection it was riddled with tiny holes which meant the chassis was beyond repair. Bruce’s solution was to use the old chassis as a template to accurately measure and replicate every piece of sheet metal required to construct a brand new chassis.
On my first visit after dropping off the car, I saw a pile of small sections of new shiny metal and over subsequent visits, these shards of metal gradually came together as the new 356 chassis. It was incredible to watch this transformation.
Putting It Back Together

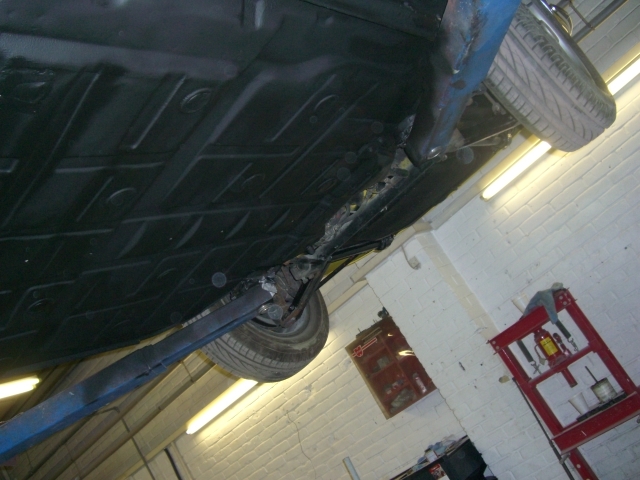
Once fully repaired to Bruce’s satisfaction – the underside of the car was given a couple of protective coats of good old Red Oxide followed by several coats of the best anti-corrosion treatment available.
It’s nice to see the underside of restored cars with a beautiful paint finish as good as the rest of the bodywork and I’m sure this is well received by concours judges. My priority however was to have the underside protected as much as possible so that I can use the car any time of the year.
During visits to check on progress it was great to see the attention to detail being applied to my car and indeed to all of the various 356s and 911s being worked on at Sportwagen.
The friends who joined me on my visits were just in awe of what was going on restore the cars to same state they left the Porsche factory in terms of their bodywork, panel fit and paint finish.
Gordon was particularly impressed by the heat shrinking being carefully applied to a door skin with a welding torch to get exactly the right tension of the skin over the door frame.
Bruce and his guys took time to explain the repair processes they were going through and they highlighted the difficulties they face in terms of the often poor quality of new replacement panels and repair sections.
It was surprising to hear about the amount of work they have to put in to make even brand new factory 911 wings and other panels fit.
I’m not sure whether this is down to old, worn tooling and presses used to create the panels but with Porsche’s increased interest in the heritage side of their business you’d have thought that this would have been addressed by now.
When it comes to 356 metalwork than that’s in a different league to 911s. The 356 bodyshell is a single, hand welded unit and whilst some repair sections such as front and rear clips can be bought – the amount of work required to make them fit often means it’s more sensible for Sportwagen to fabricate the parts themselves from sheet steel.
Using such magical devices as the English Wheel to create replacement panels or sections is where real skill and artistry comes into play.
Apart from the obvious issues with the underside of the car – the other challenges on my 911 were around poor panel fit, badly adjusted doors, a distorted bonnet with dodgy locking mechanism, rusting in one of the front windscreen frame upright sections, rust bubbles on the steel sunroof, rust infected front and rear bumpers, rusty rear centre panel etc. etc.

With all of these repairs to various parts of the car it was obvious that a full respray was going to be required. Bruce normally encourages people to have cars returned to the colour they left the factory so he asked me what the original colour of my car was.
I explained that according to factory records and the code stamped on the car – its original colour code was 3939 which equated to Olive Green. Now I’m not sure if people are familiar with Porsche Olive Green but I’ve seen it in photos and in the flesh and it’s horrible.
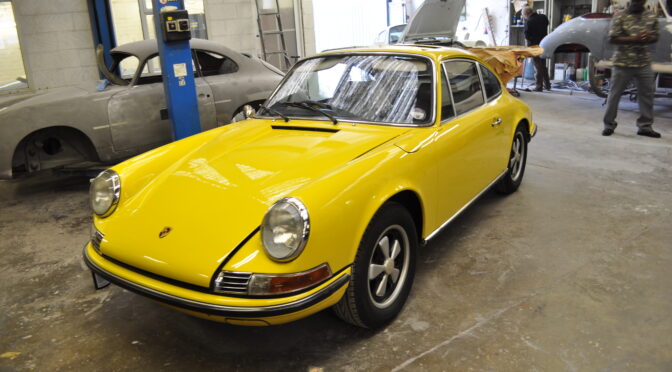
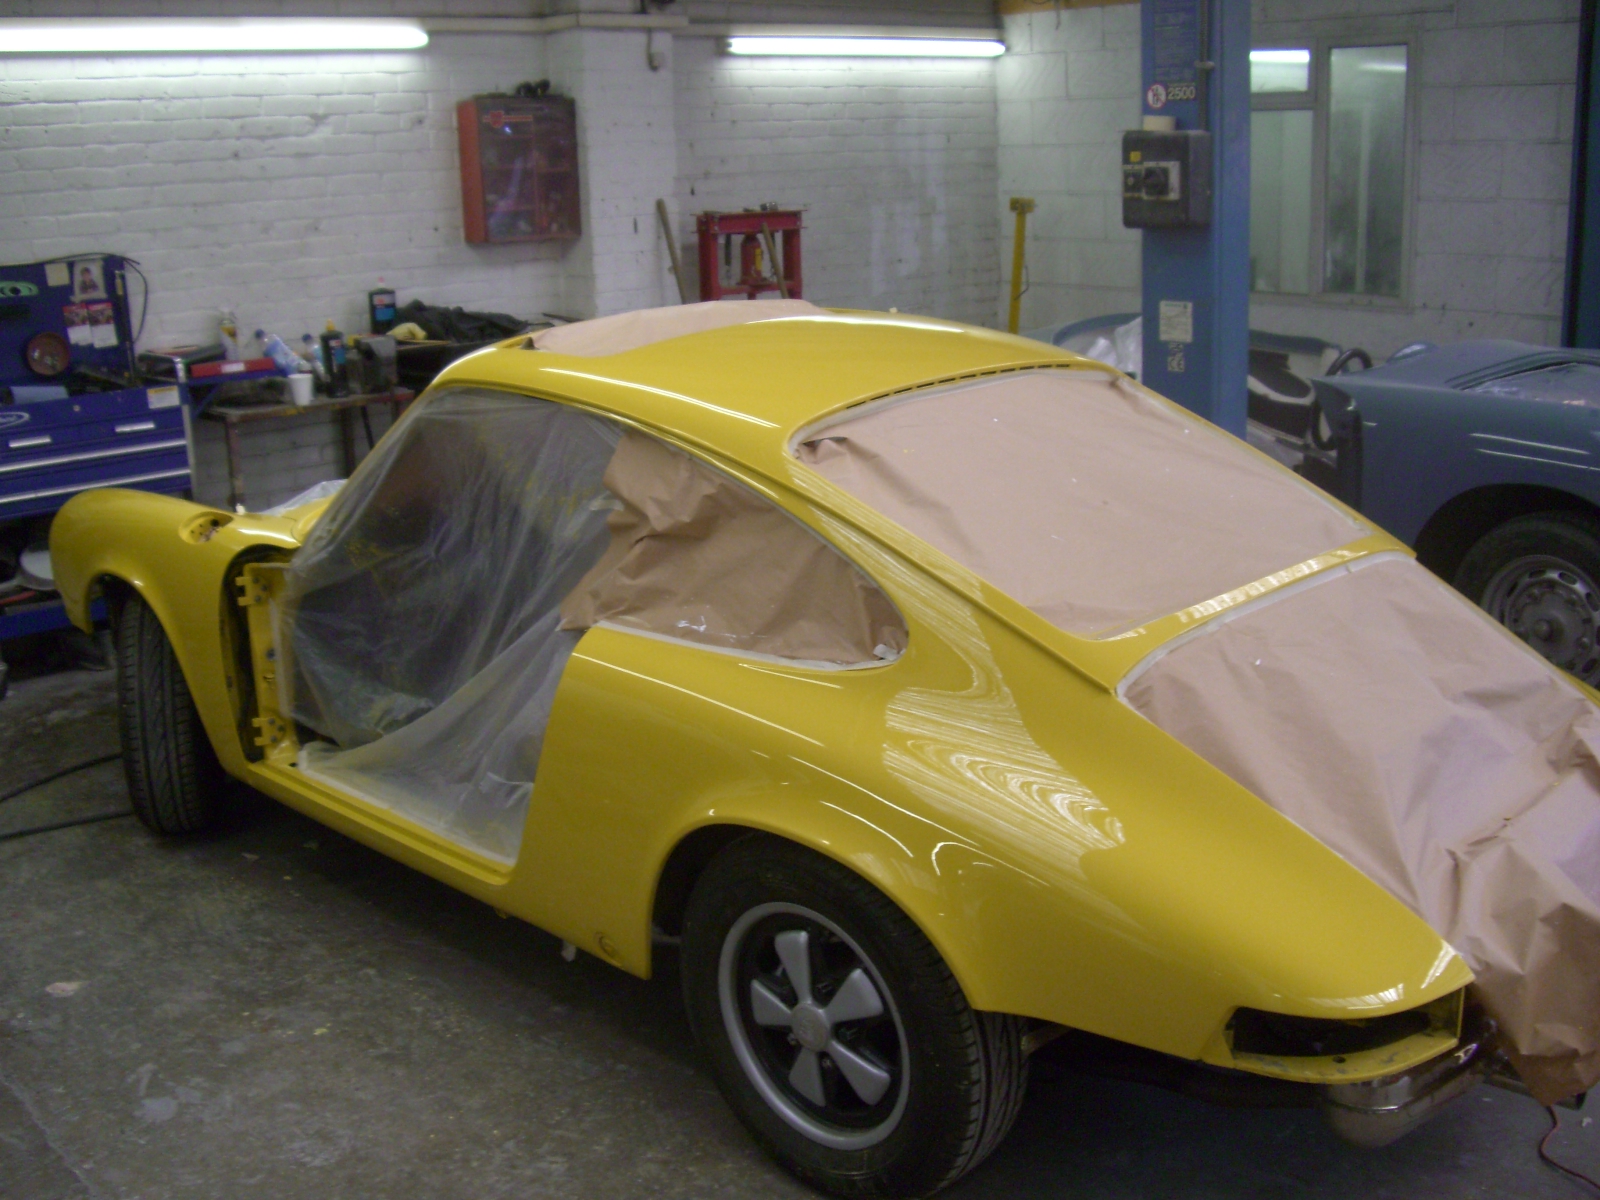
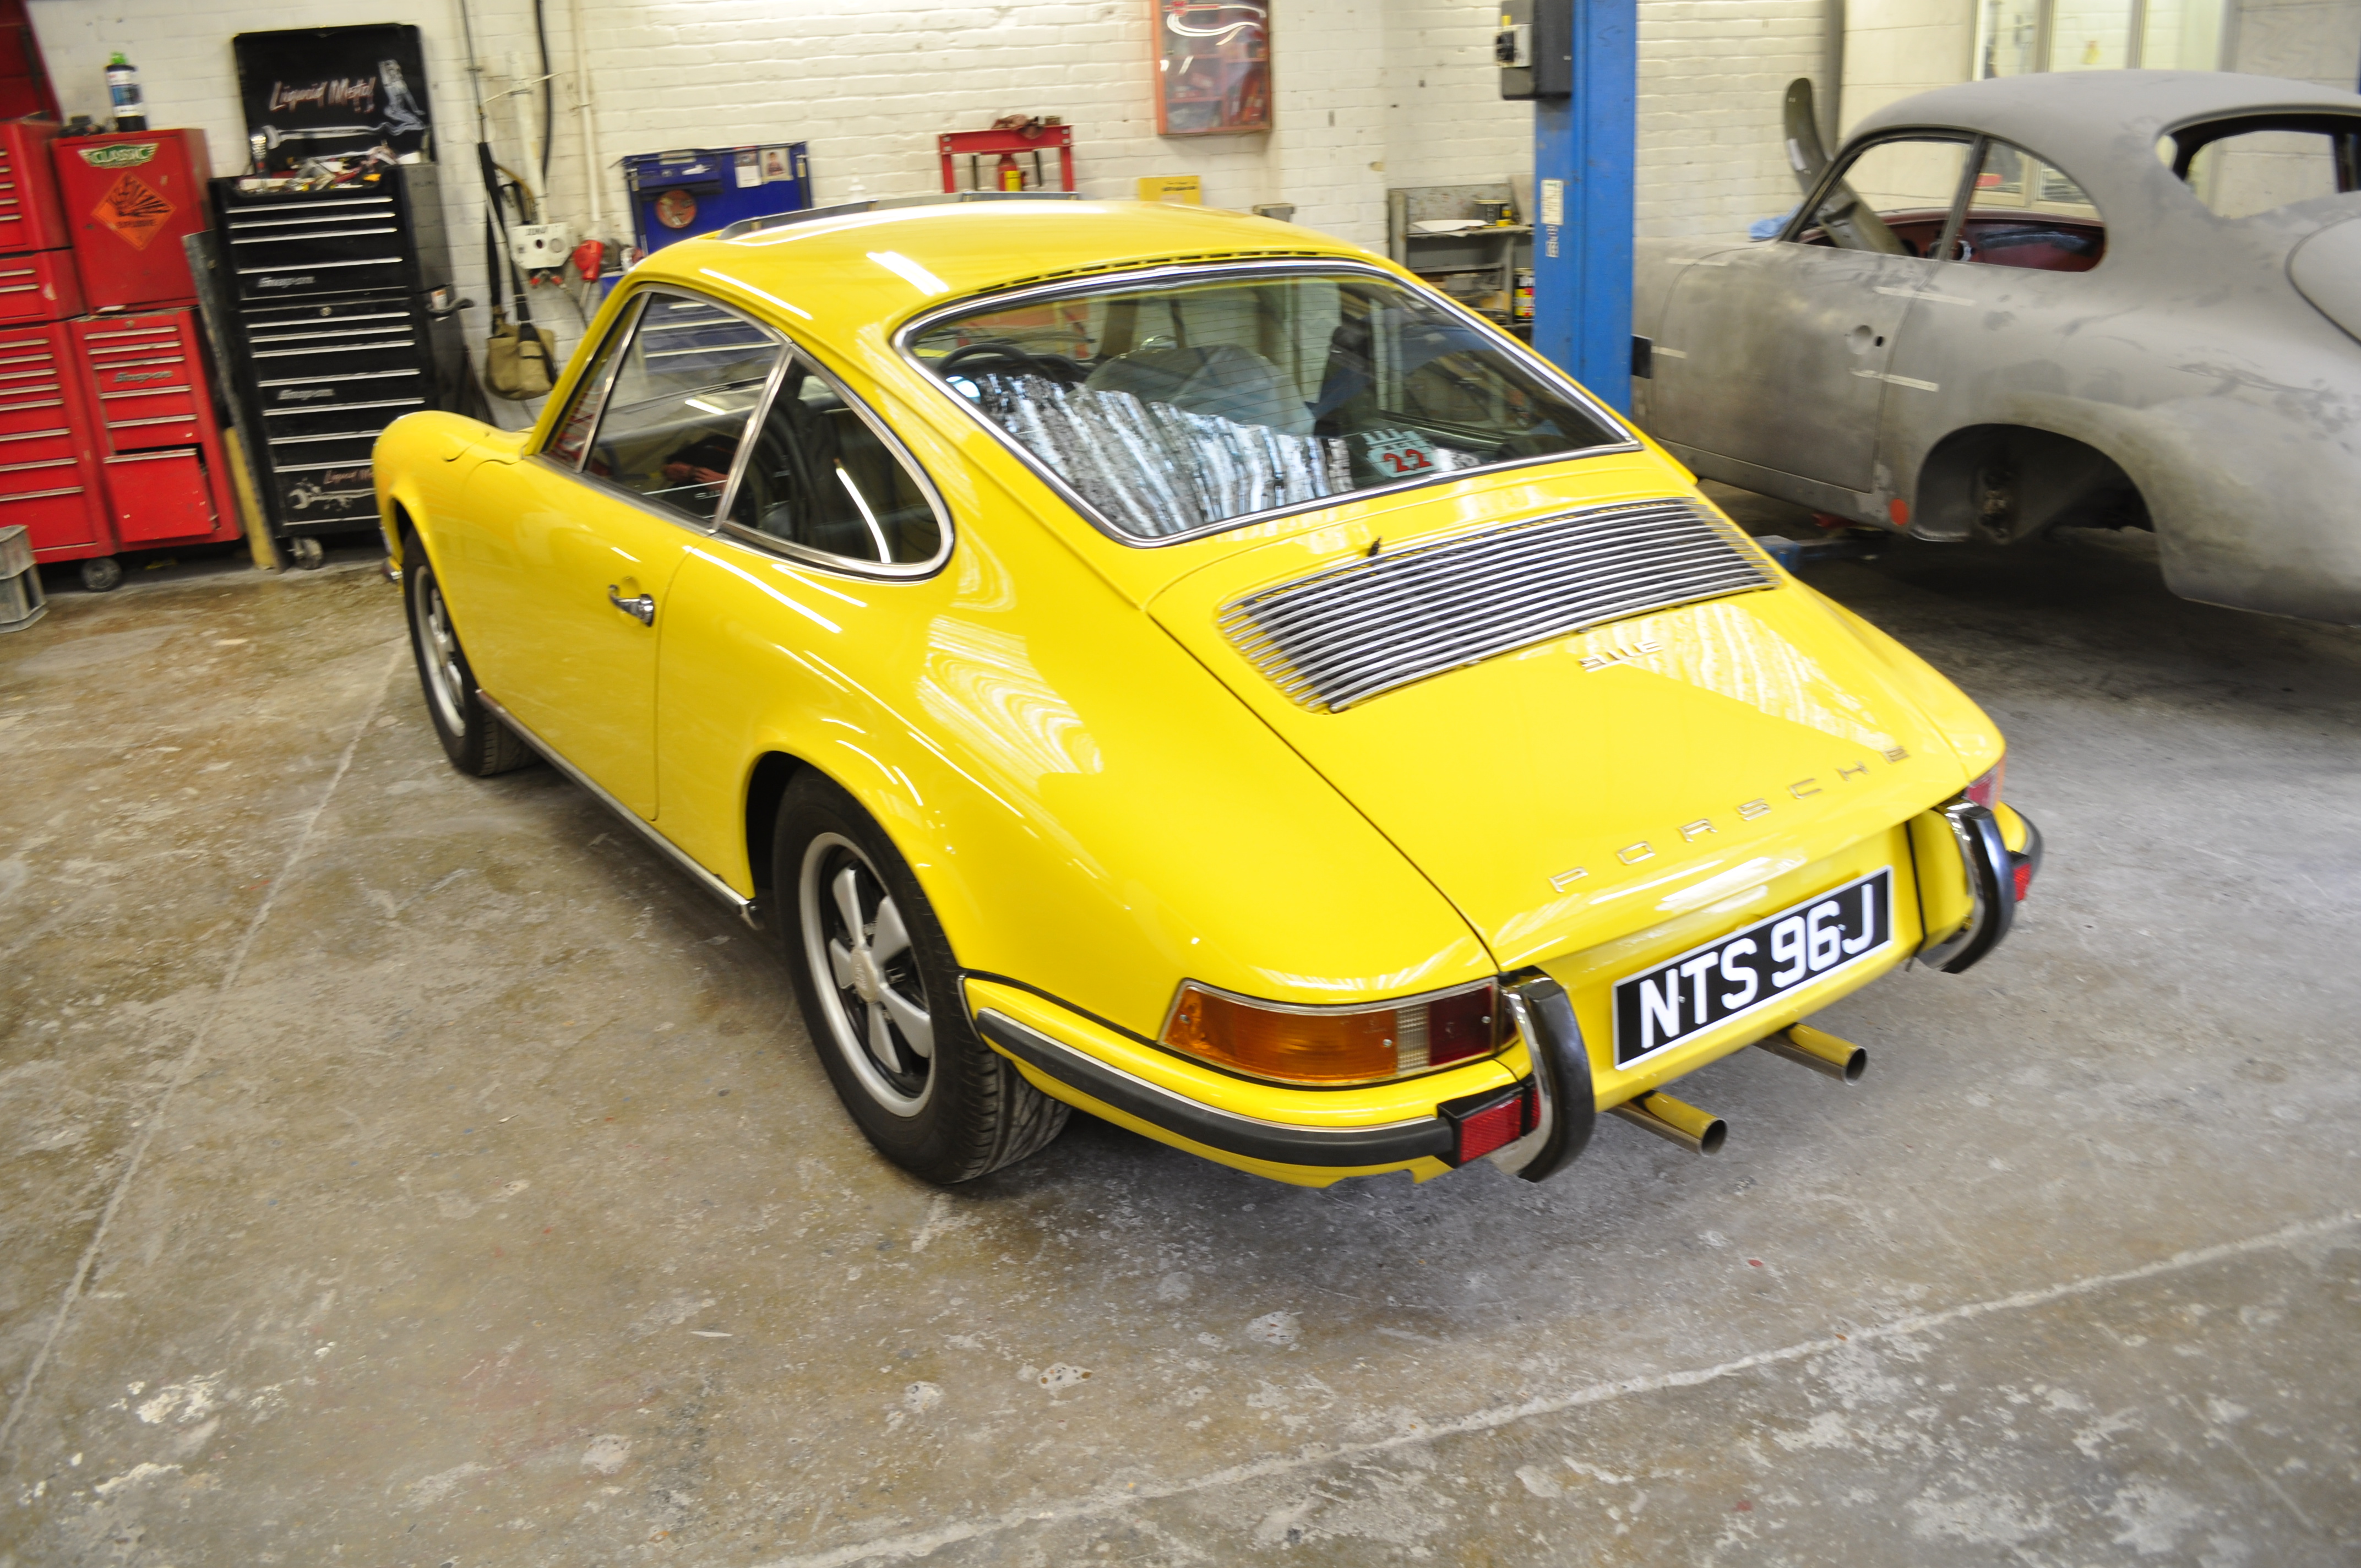
Without hesitation Bruce replied – ” Let’s stick with Zitron Gelb”! This colour (Lemon Yellow) was a period special order colour and to my mind a much more 70’s colour than Olive Green.
Porsche practise in the early 70’s was to explore the full range of psychedelic colours available from Lime Green through Tangerine to Chocolate Brown.
Such was the speed differential between 911s and more mundane 70s cars – I think the theory was that it was better to have something eye-catchingly bright to warn other drivers of the Porsche projectile rapidly approaching them.
With all repairs completed – the body shell (minus the detachable panels which were being spayed separately) was masked up and into the spray booth it went.
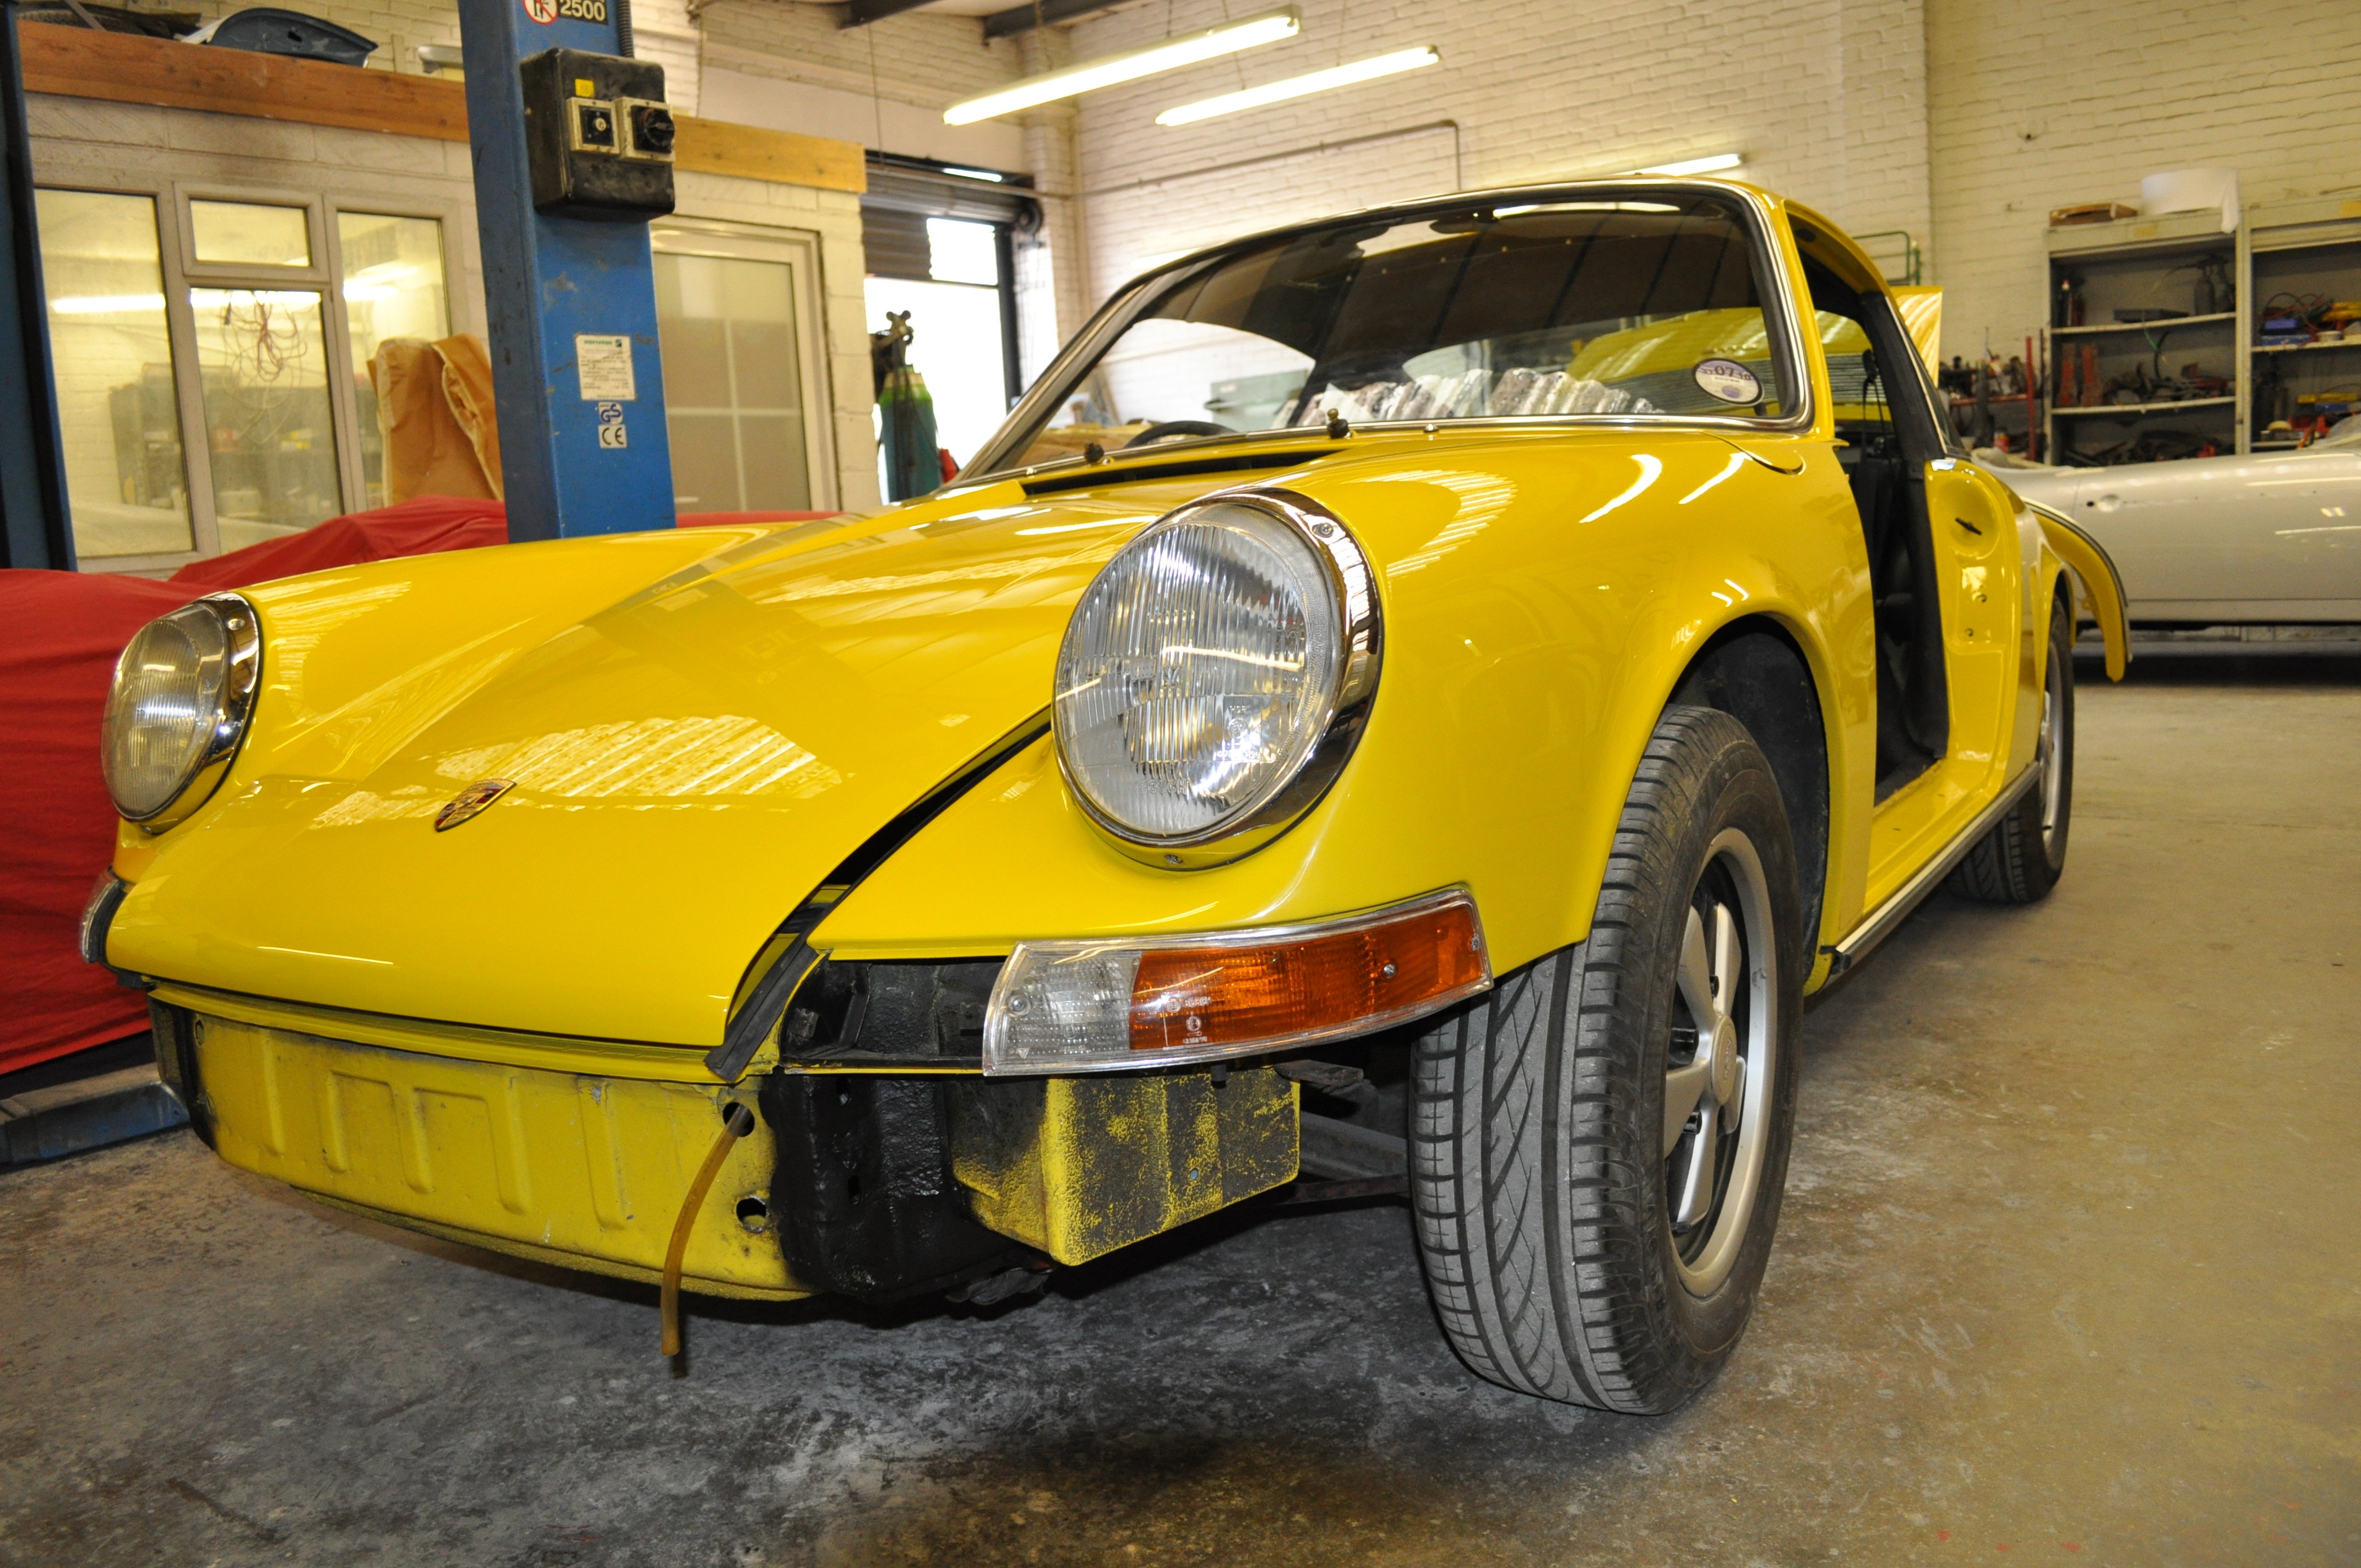
After the paint spraying magic performance was completed, the gleaming car emerged ready for the doors, bonnet, engine lid, sunroof, front and rear panels to be fitted.
As the front seats had to be removed to carry out repairs – I took the opportunity to get Bruce’s upholsterer to fit some additional padding to the somewhat saggy seat squabs. The extra seat padding was aimed at slightly raising the seating position and damping the tired seat springs through the insertion of foam inserts to reduce the feeling that I was driving a bouncy castle!

Some bits and pieces had to be replaced along the way. The rear central panel was just too rusty to sensibly repair. Not surprising given the constant heating and cooling it goes through adjacent to the engine and exhaust.
One of the tail light units also had to be replaced along with various bits of trim which would have dragged down the overall finish of the car if left unchanged.
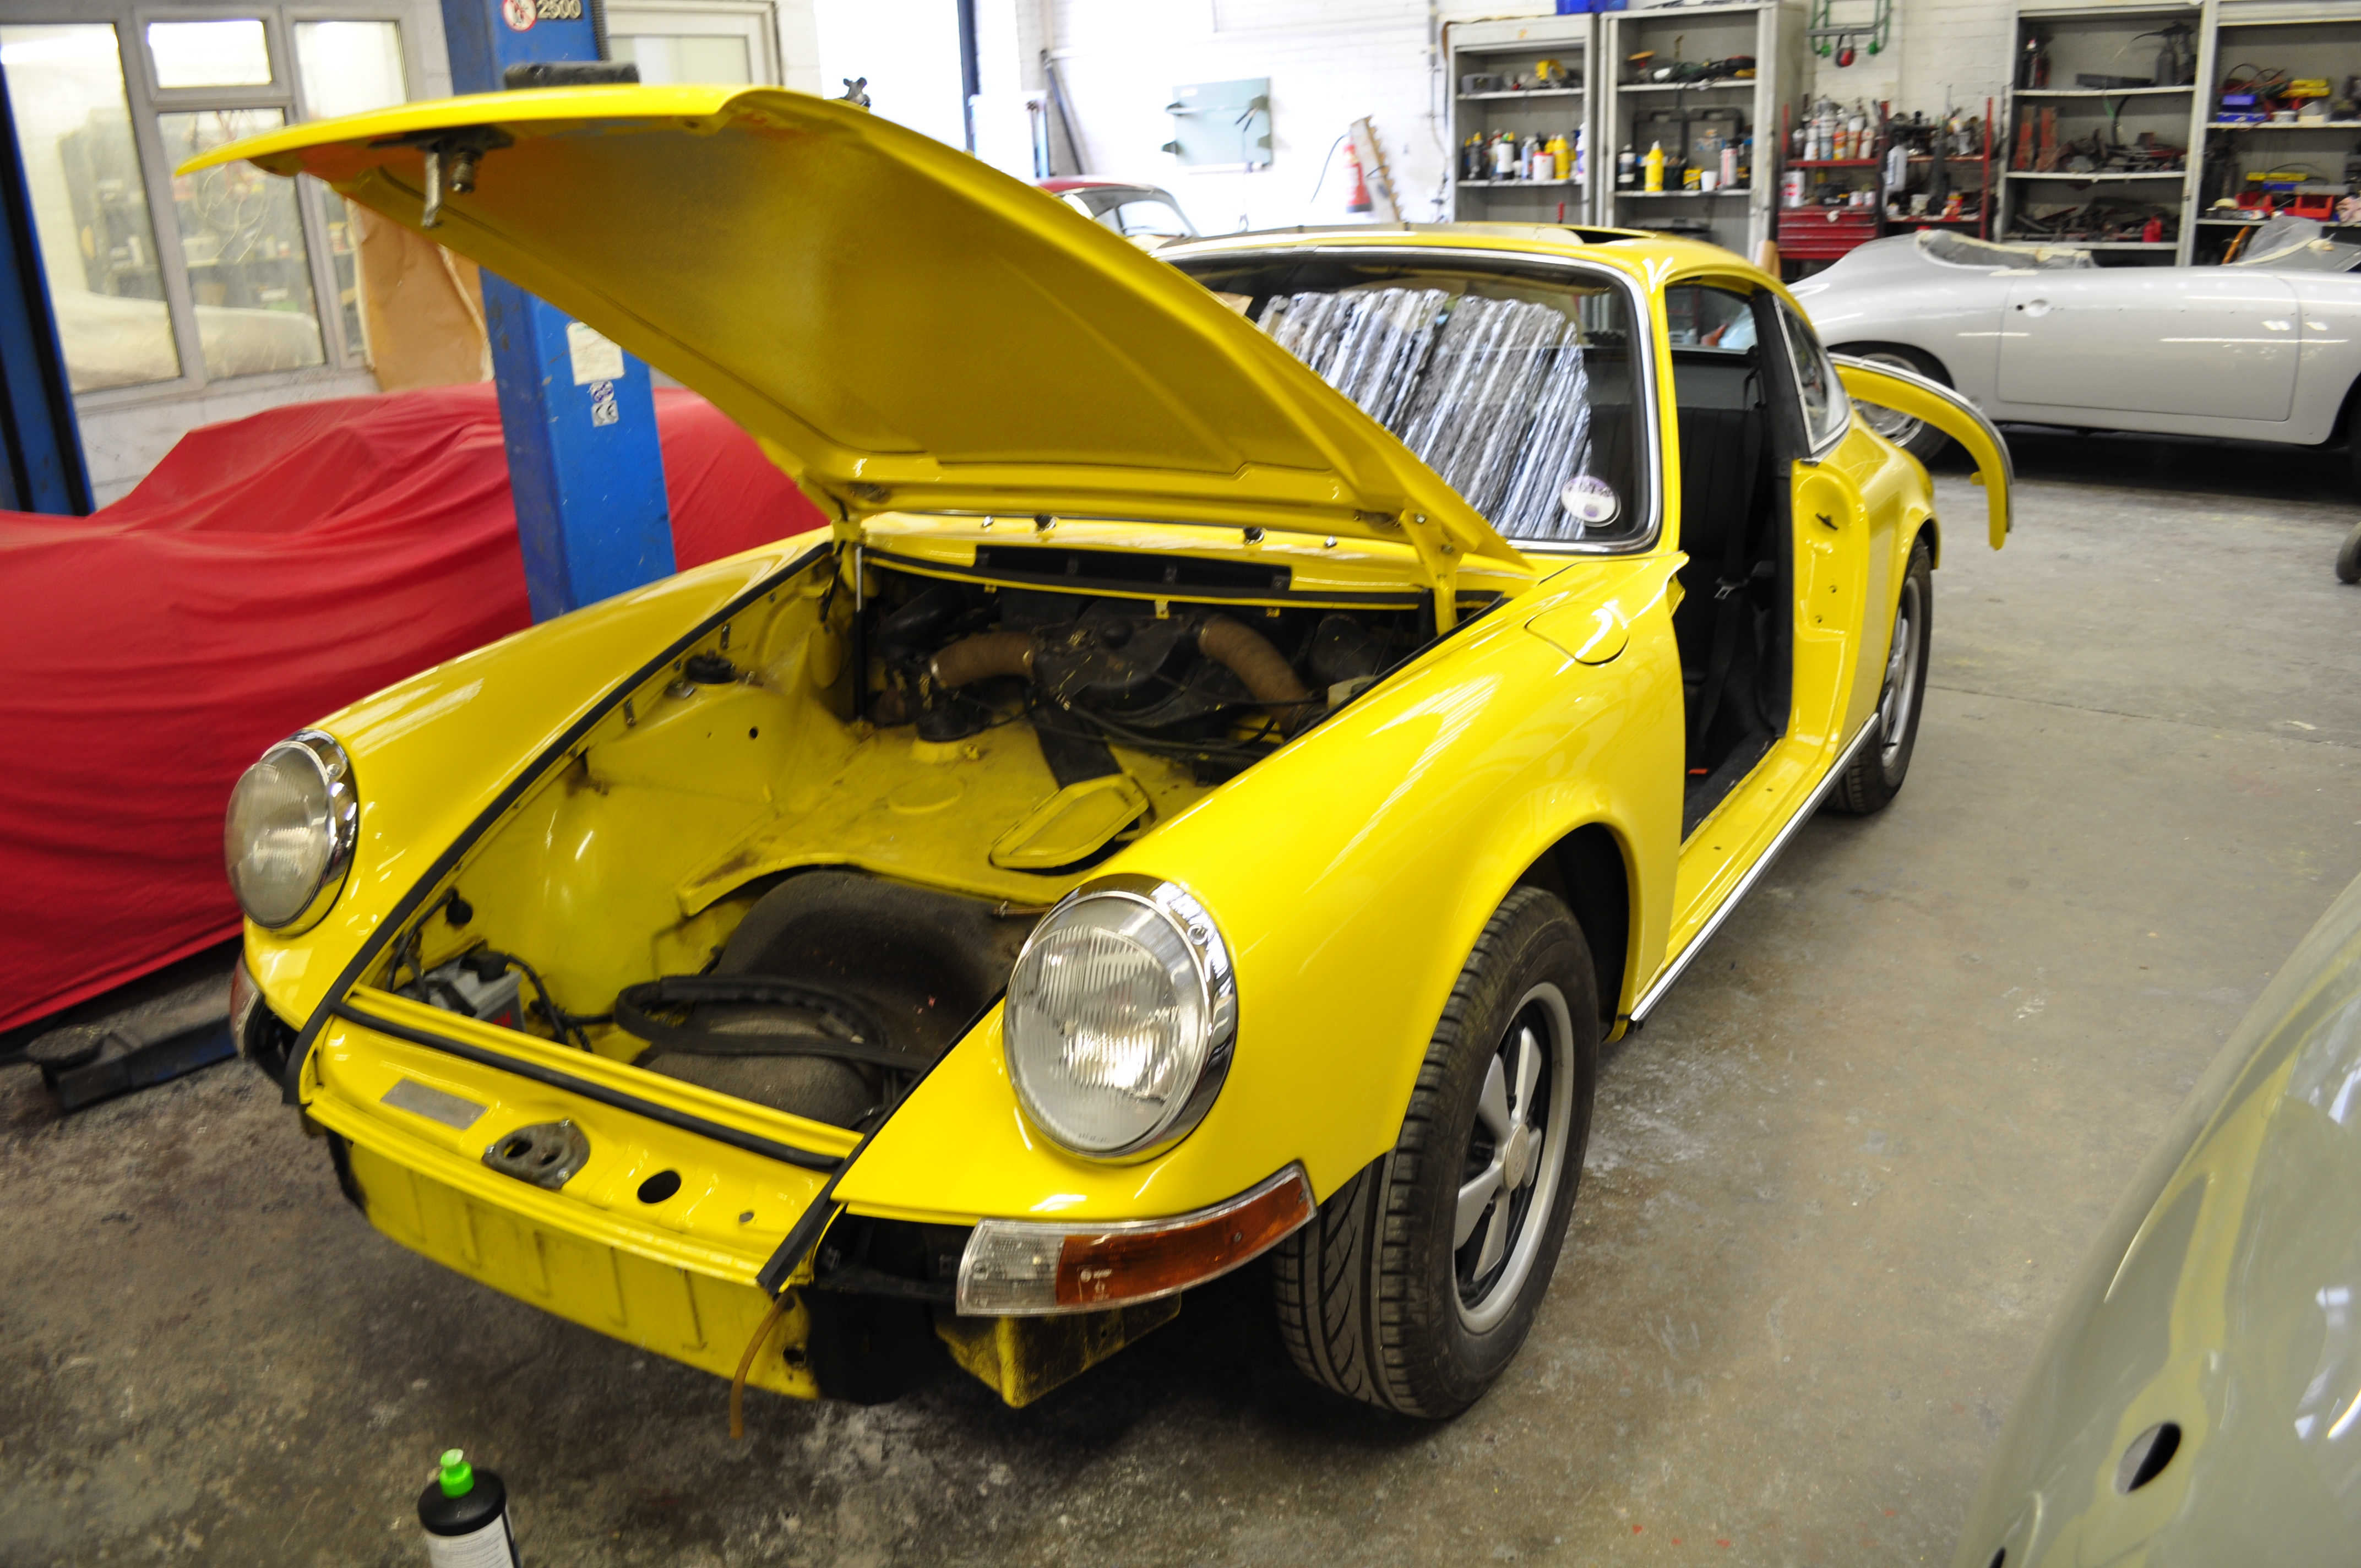
The bonnet needed quite a lot of work as it was distorted and badly repaired from the original “restoration”. This was why it never fitted well into the front bonnet catch.
Once completely straightened out, de-filleted and properly finished it now fits perfectly and no longer needs to be sat on to close the bonnet catch.

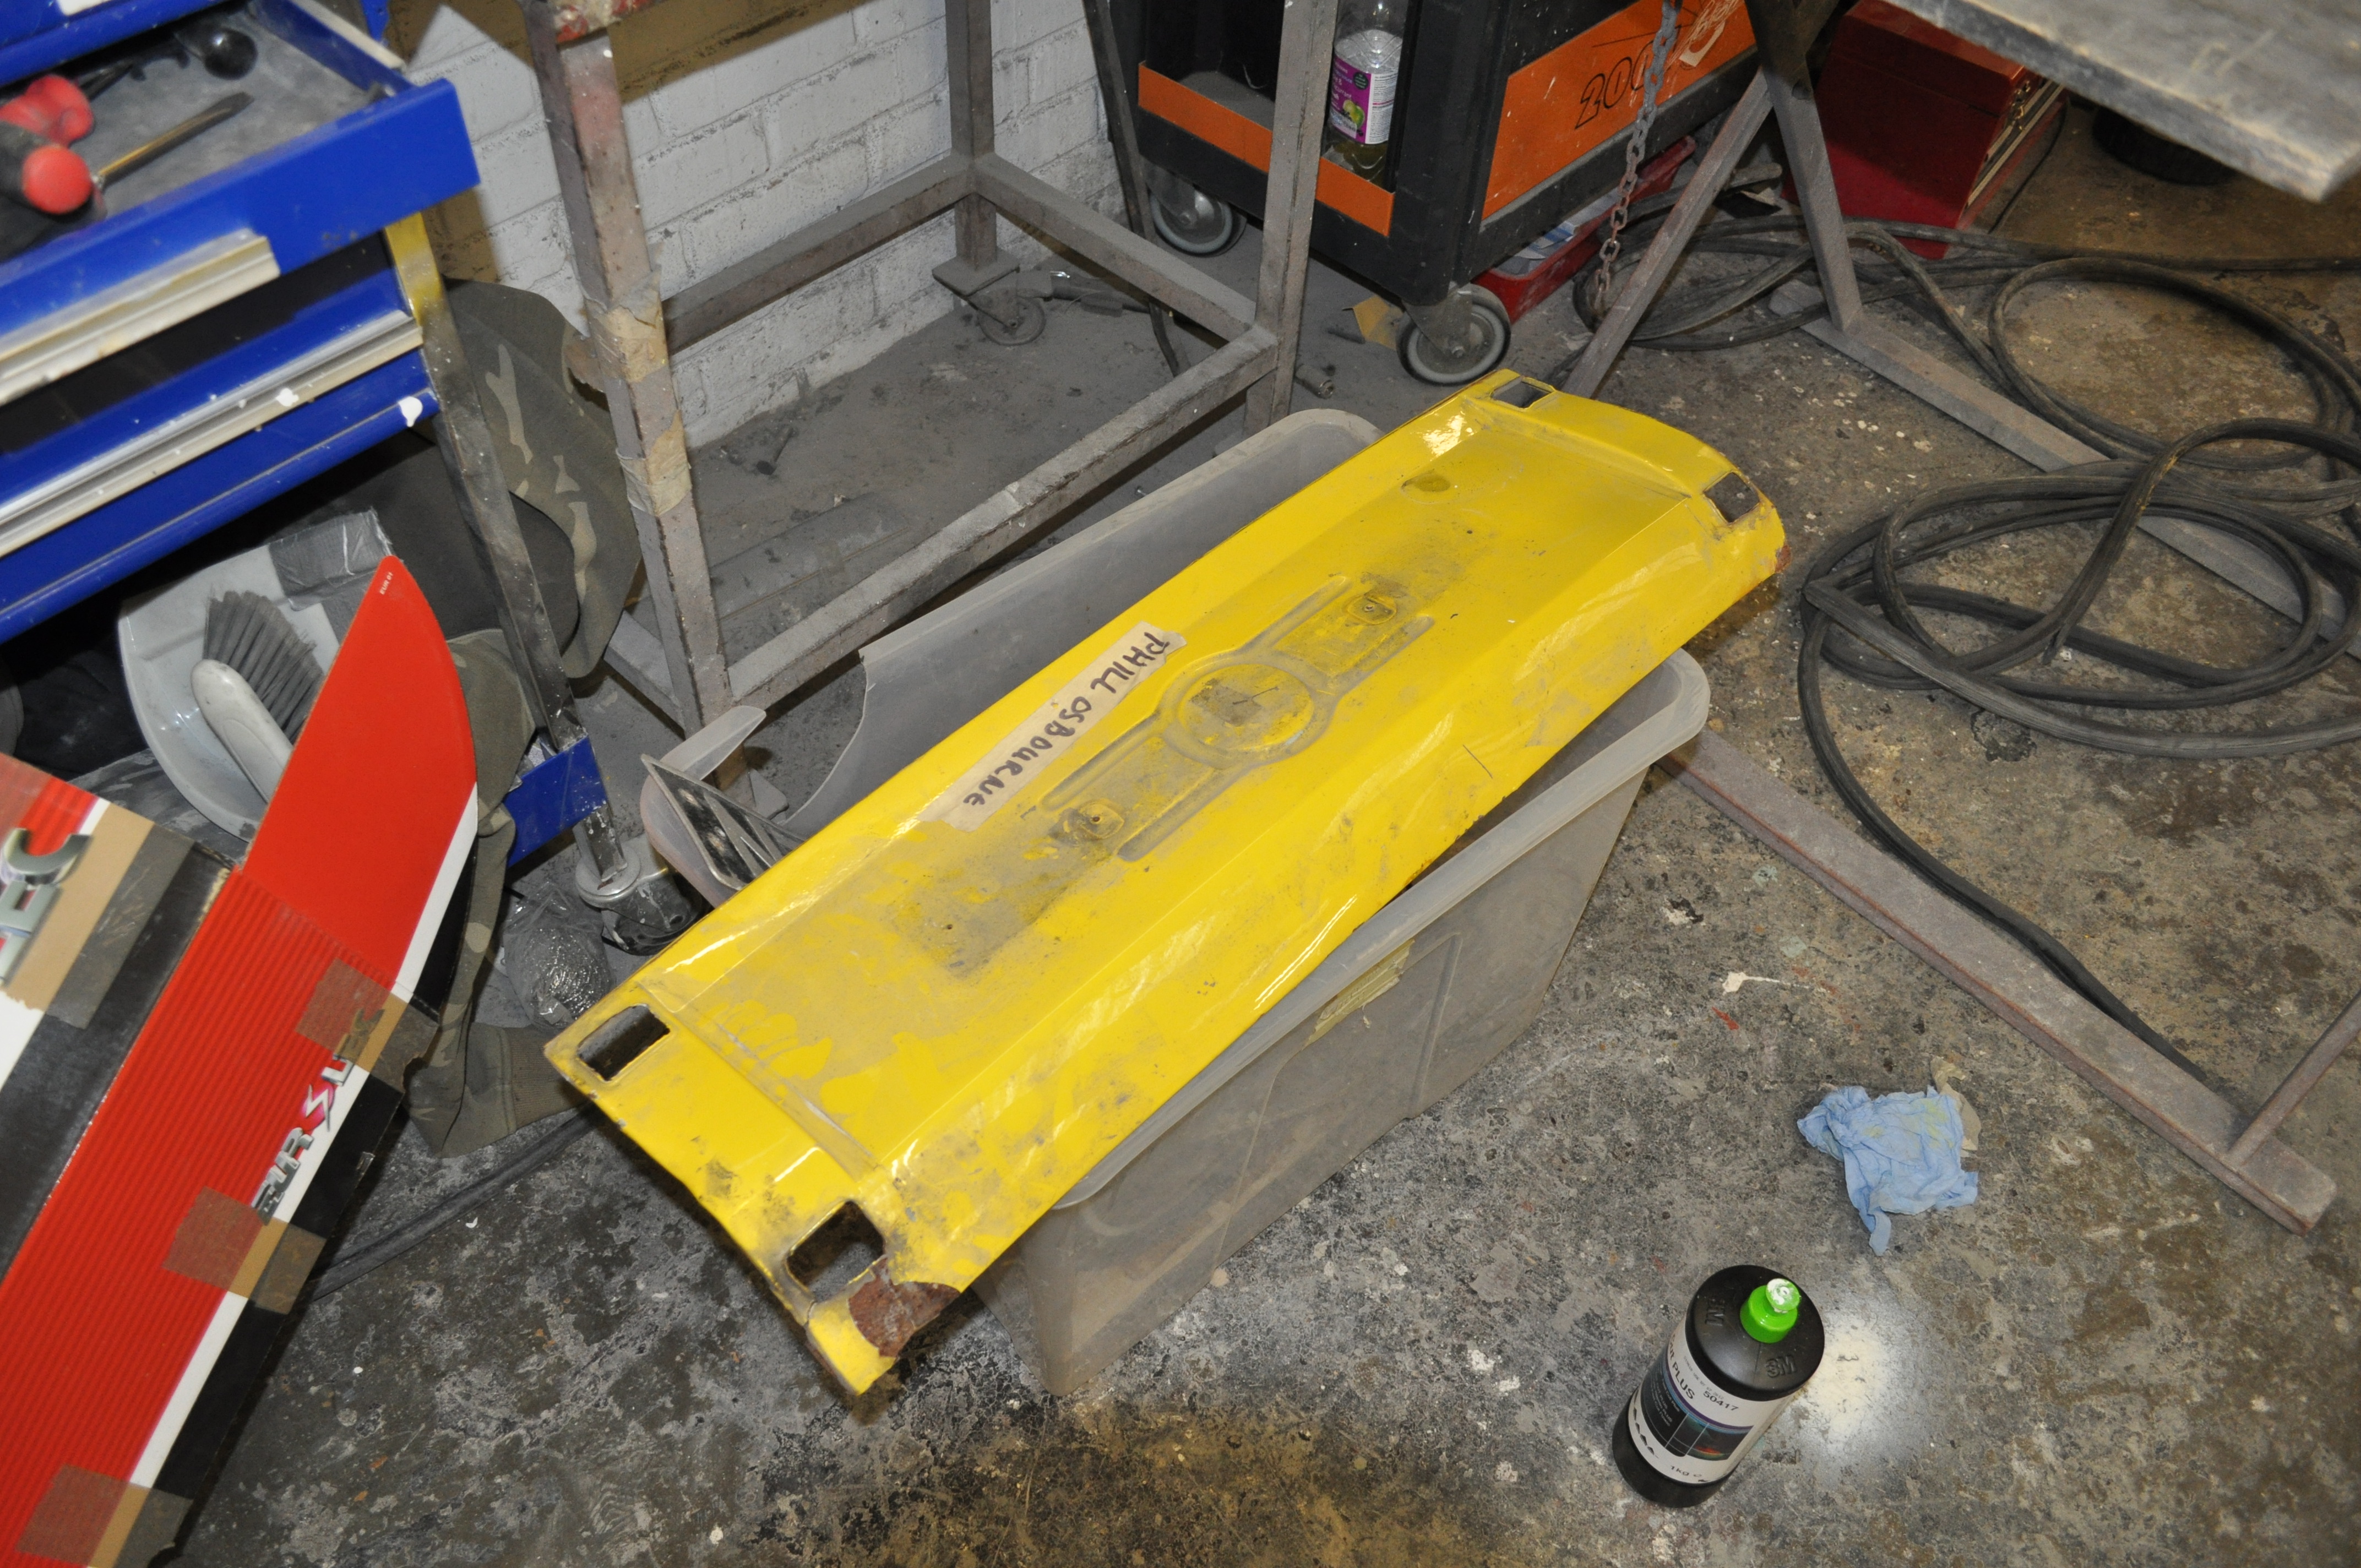
The steel front bumper along with the removable fog light cut-outs needed a good bit of work to take it back to bare metal and then re-finish it.
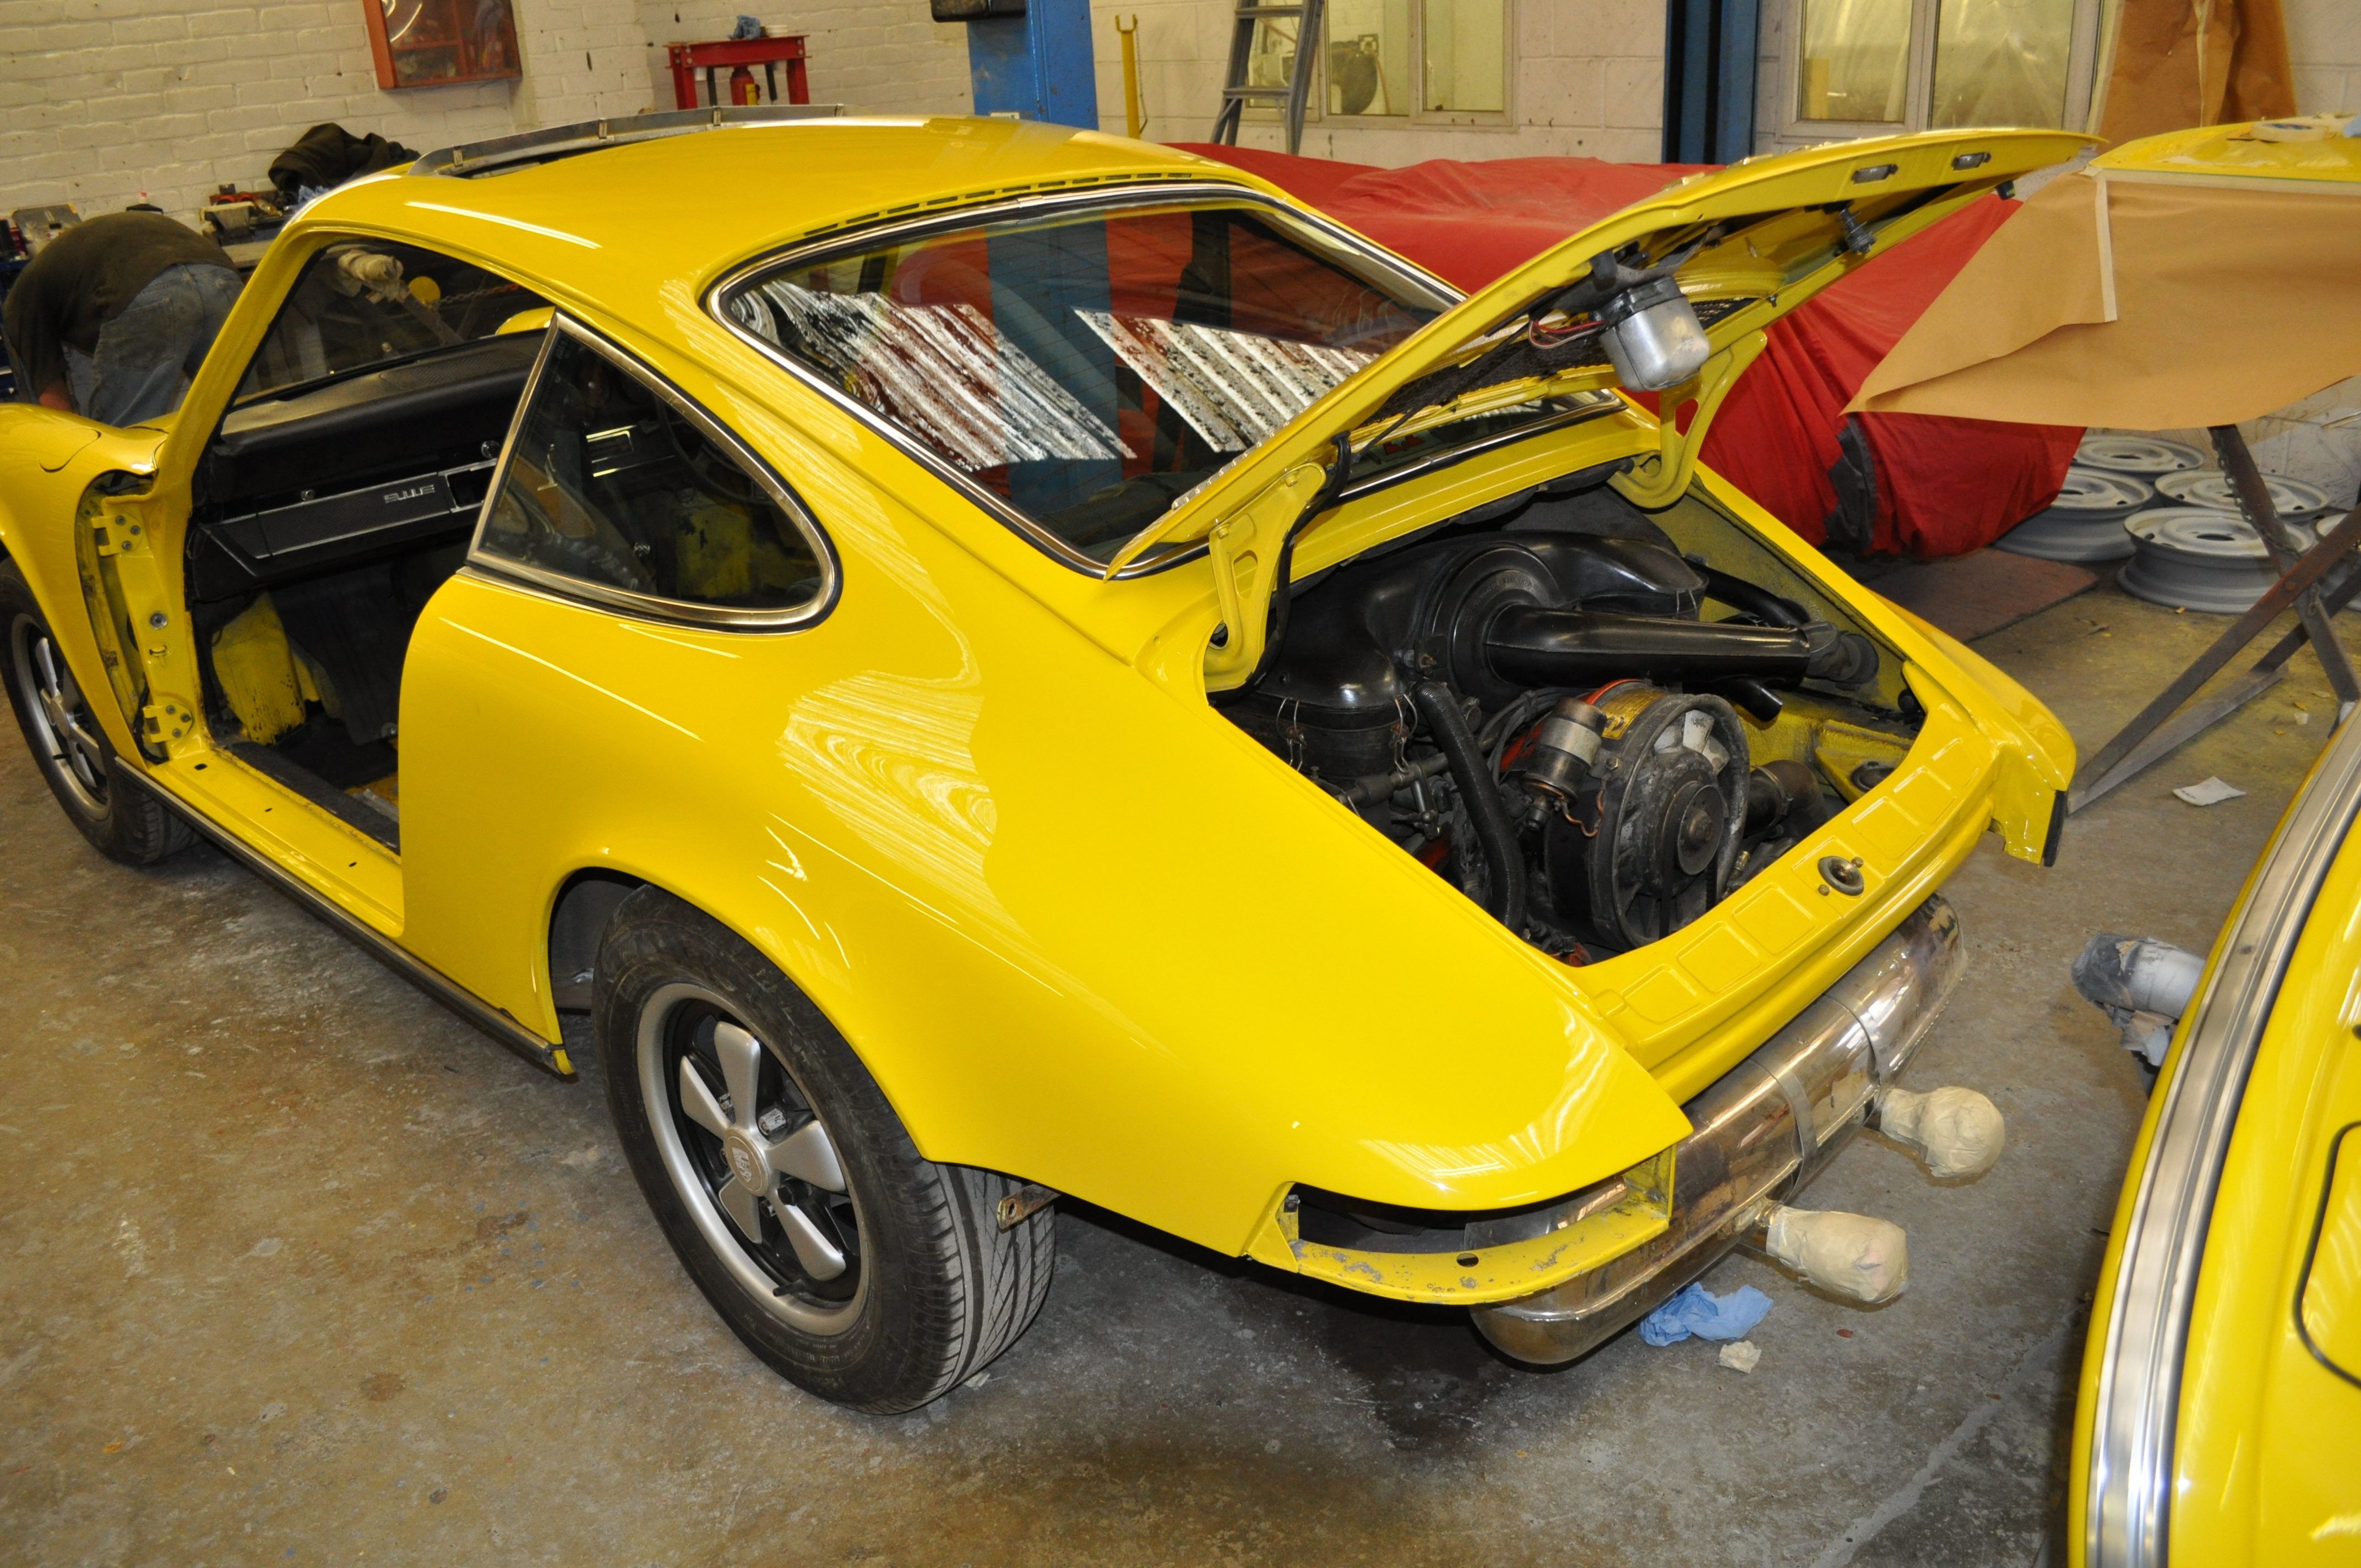

The rear panel which fits between the 2 rear bumpers was badly rusted and not worth repairing so it was replaced with a new panel.
The engine looks a bit grubby in contrast to the gleaming bodywork. Steve at Jaz will sort that out during the planned engine rebuild. He’s not going to be out-blinged by Bruce’s bodywork!
Just before the front bumper goes back on – there’s a glimpse of the ant-corrosion coating liberally applied to the underside of the car.
Doors on, sunroof in after much fiddling with the seal. New panted rear panel in place between the rear bumpers and number place all cleaned up to match the rest of the car.
I couldn’t believe it when Bruce pointed out the almost indistinguishable little crescent shaped cut outs he’d made in the base of the rear centre panel. A tiny detail which will prevent the twin pipes of the Dansk exhaust from vibrating against the panel.
So in simple terms the Sportwagen work included:- Removal, adjustment and alignment of front wings/Cutting, straightening and re-alignment of the rear wings/Removal, re-shaping and repair of bonnet/Removel, blasting, repairs and realignment of front and rear bumpers/Removal, dismantling, repairing and rebuilding of doors/Removal of front and rear windscreens to facilitate repairs to front screen pillar & rear roof air-vent area and to enable injectionof wax and anti corrosion fluids into body cavities/Removal, dismantling and rebuilding of engine lid/Stripping of underside of the car from main floor pans to perimiter seams, metal repairs to floor pans and seams, red oxide priming and Wurth SKS coating of underside/Refinishing of the bodyshell including dent removal and repainting including priming, baking and finishing/Refitting and correctly aligning removed doors, engine lid, bonnet, bumpers, sunroof etc./Replace defective front and rear indicator units/Hand flatting and polishing.
All that for a car that was supposedly fully restored!
Transformation & Lessons Learned
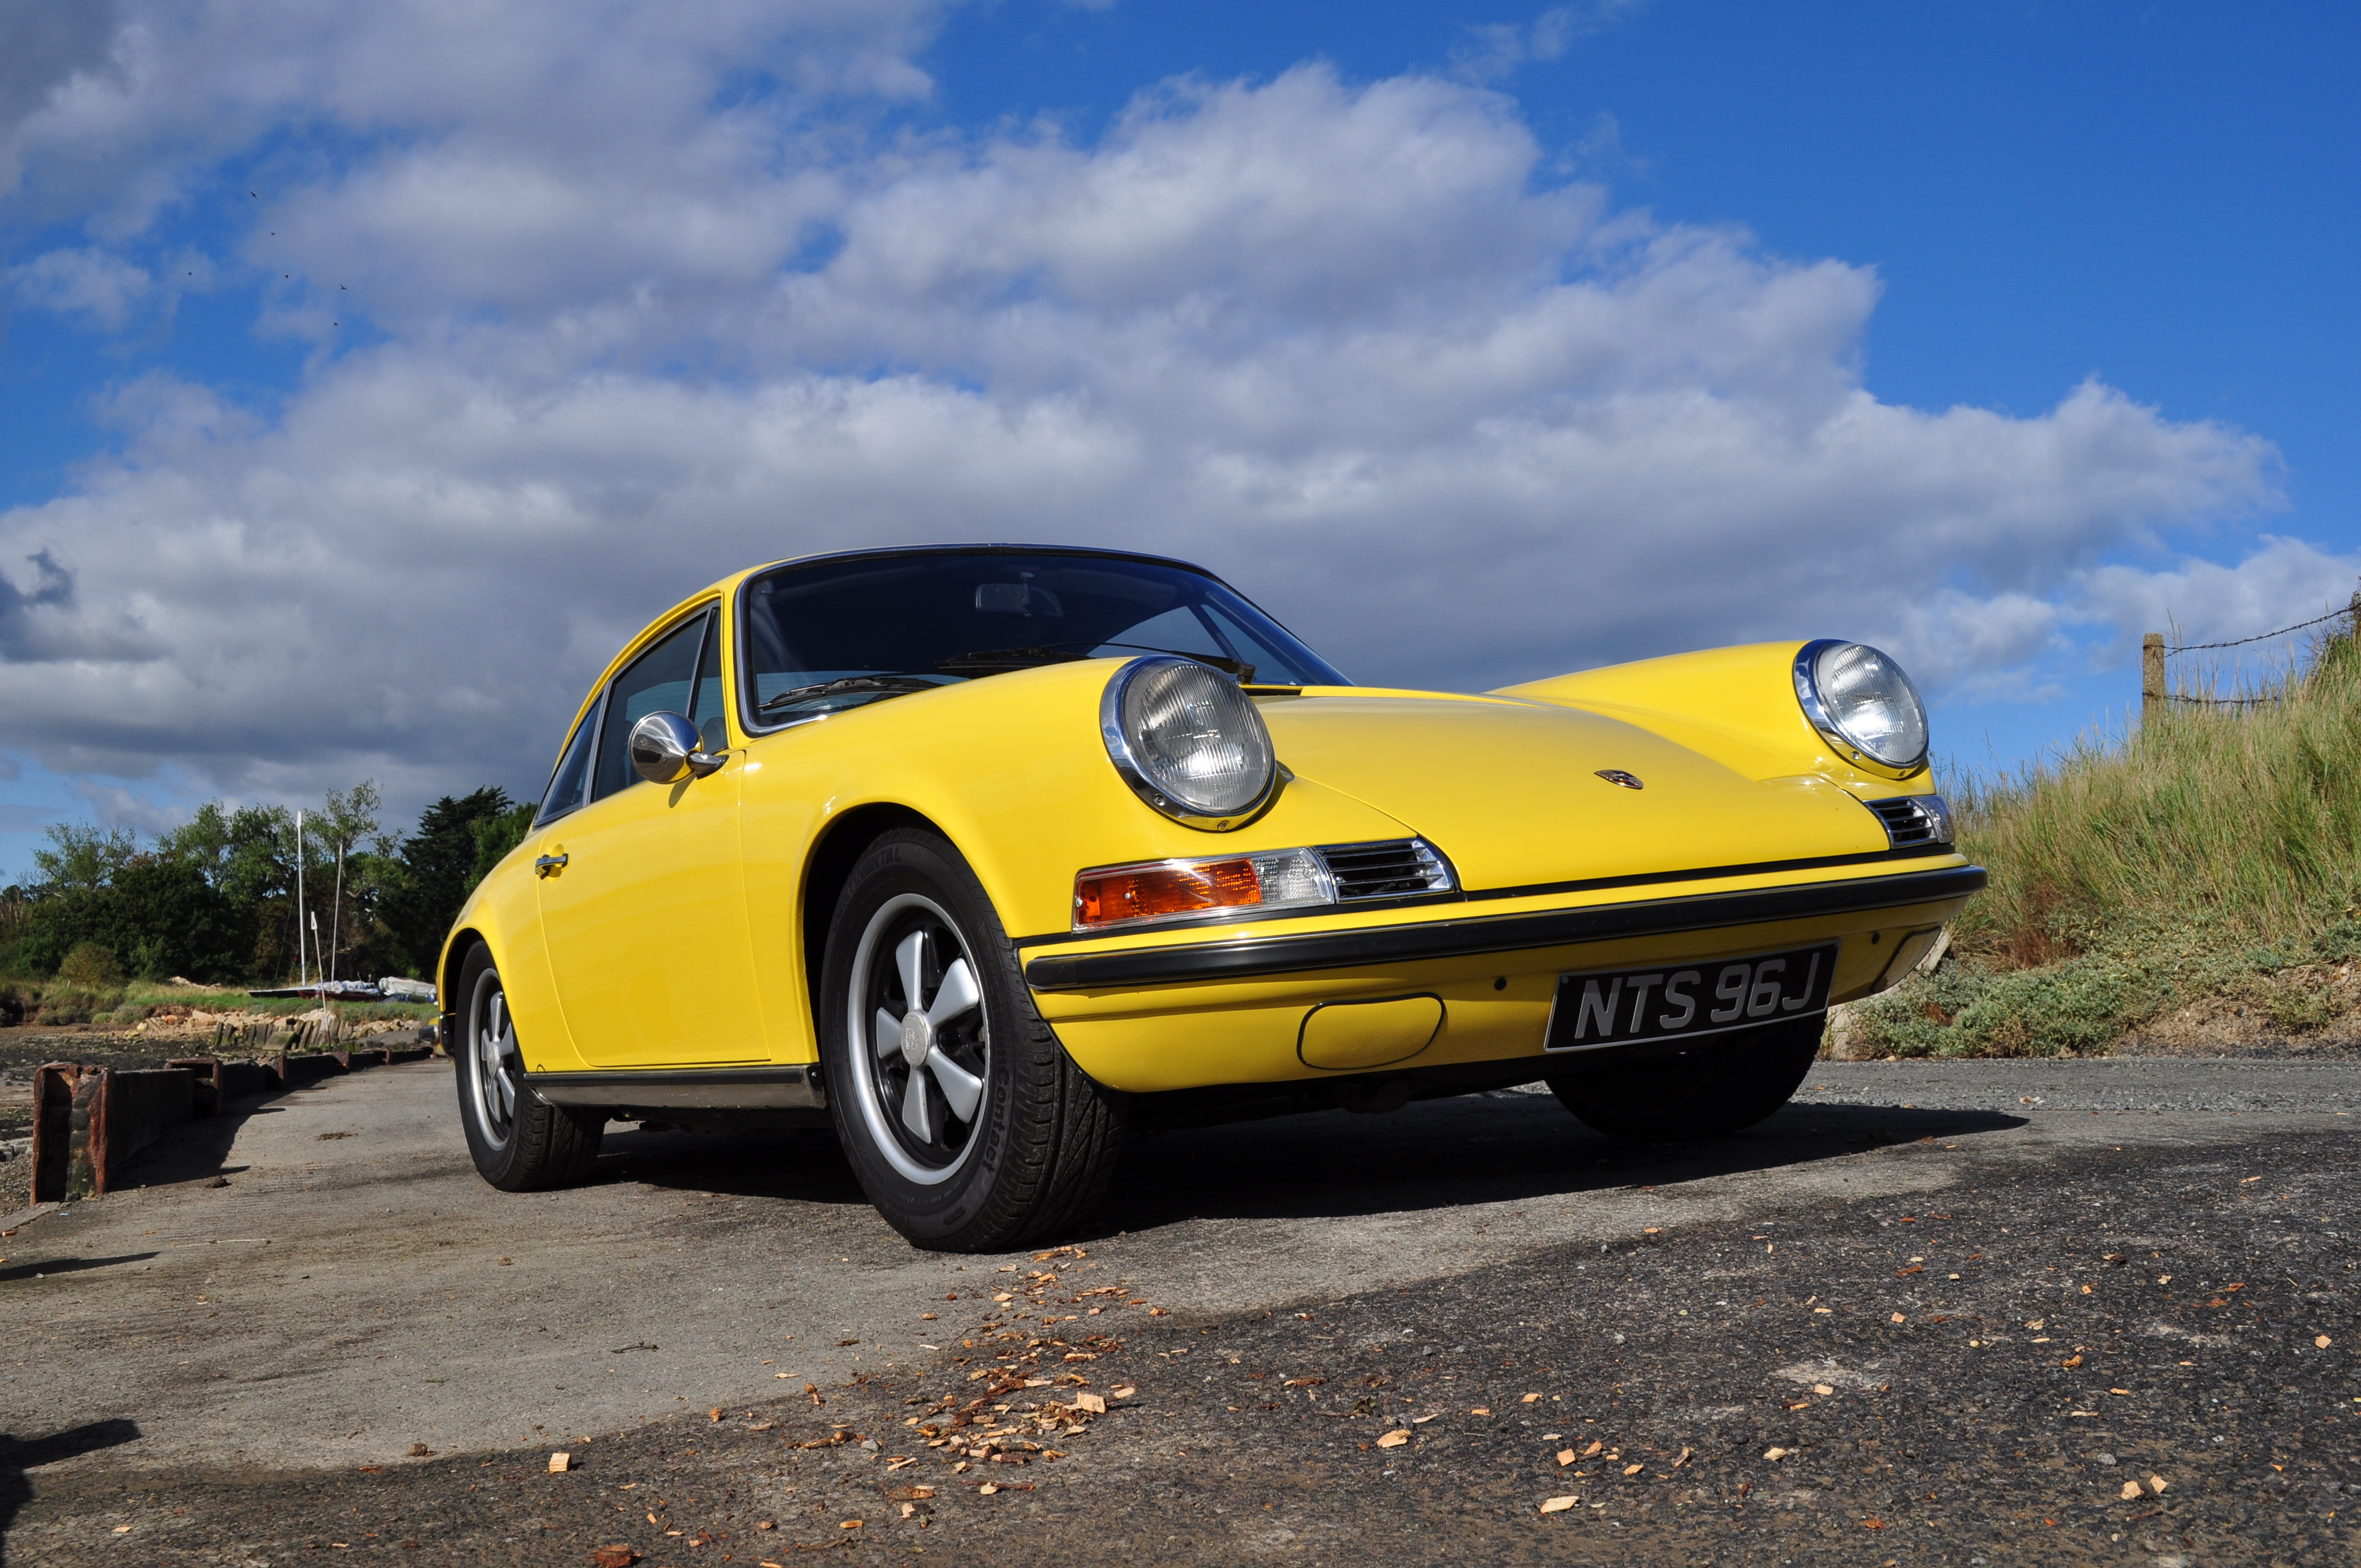
Picking the car from Sportwagen up after completion of all of the bodywork repairs was fantastic and I just had to take it for a drive along the coast with Gordon (who’d given me a lift to Sportwagen) to experience it again and to get some photos before heading back to London.
The bodywork of the car was transformed by Bruce and his team thereby enhancing its longevity and value. Not only was the rust on the underside of the car comprehensively sorted out but they also worked miracles in correcting mistakes and issues from the original “full restoration”.
Whilst I’m glad I did eventually find Jaz and then Sportwagen – much of the work they’ve done is to undo the mistakes, bodges and short-cuts of the previous “restorer” and this has been frustrating and costly.
The moral of the story? When embarking on a 911 or 356 restoration project – don’t use unknown or cut price restorers. Find the best best bodywork and mechanical specialists you can (they can be different companies) and get the job done properly as you only want to do it once. There’s no substitute for true craftsmanship and whilst recommendations can be helpful you should always visit the workshops of the companies you intend to use to see first hand the way they work. You’ll be able to quickly distinguish the specialists offering true quality and craftsmanship.
With the benefit of hindsight I know I should have pointed my project car at Sportwagen and Jaz for bodywork and mechanical restoration from the outset. Bruce and Steve are incredibly knowledgeable and expert specialists in their respective fields. They work really well together and are regularly delivering some of the very best Porsche road and race car restorations available. I’d strongly recommend them to anyone.
Hi Phil,
The car looks great! You must have spent a fortune on this, but it looks totally worthwhile!
Sudeesh
Sudeesh,
High quality work doesn’t come cheap and that’s why I emphasise the point that it makes economic sense to use it to deliver the best results from the outset rather than to fix the mistakes and shortcomings of less skillfull restorers especially when the value of early Porsches and Classic Cars in general is on an upward curve.
The problem is that most cars have gone through some sort of repairs or restoration at some time in their lives and as you know the quality of work can vary dramatically…… with costly consequences.
Cheers,
Phil
simply fab ! enjoy the beast …..
Thanks Ahmet – I aim to.
Cheers,
Phil.